Well it looks like we found a contractor that performs substandard finish work in our area. James Dean Bruderick. This contractor has been asked to correct issues with the tile installation and plumbing as they were progressing but chose to work at a fast pace, not correct the issues, and moved along creating even more issues. There were many issues in violation of ANSI and TCNA standards as well as plumbing and electrical code. All by Mr. Bruderick of Creative Decor in Michigan.
It's very frustrating and disheartening as we worked very hard planning the bathroom remodel. It's unfortunate that the finish is not what we were expecting at this point.
Ref:
ANSI A108.02 section 4.3.8
ANSI A108.02, Section 4.3.7
Michigan Plumbing Code section 308.5
These pictures are a subset of the issues. The tile job is botched and could stand to be completely gutted and redone to fully fix it.
This light fixture really didn't fit in the hole. James apparently tried to grind away at the joist above to get it to fit but since only the bottom of the joist was ground down it sat tilted in it's hole causing the light fixture to not sit flush with the ceiling. Also, probably not a good idea to grind away at supporting joists, just move the fixture over the 1/8th of an inch and make it right.
For some reason the electrical connections weren't clamped into the provided fixture junction box.
There were other electrical violations as well, many of the cables were not supported with any staples and one switch was wired incorrectly.
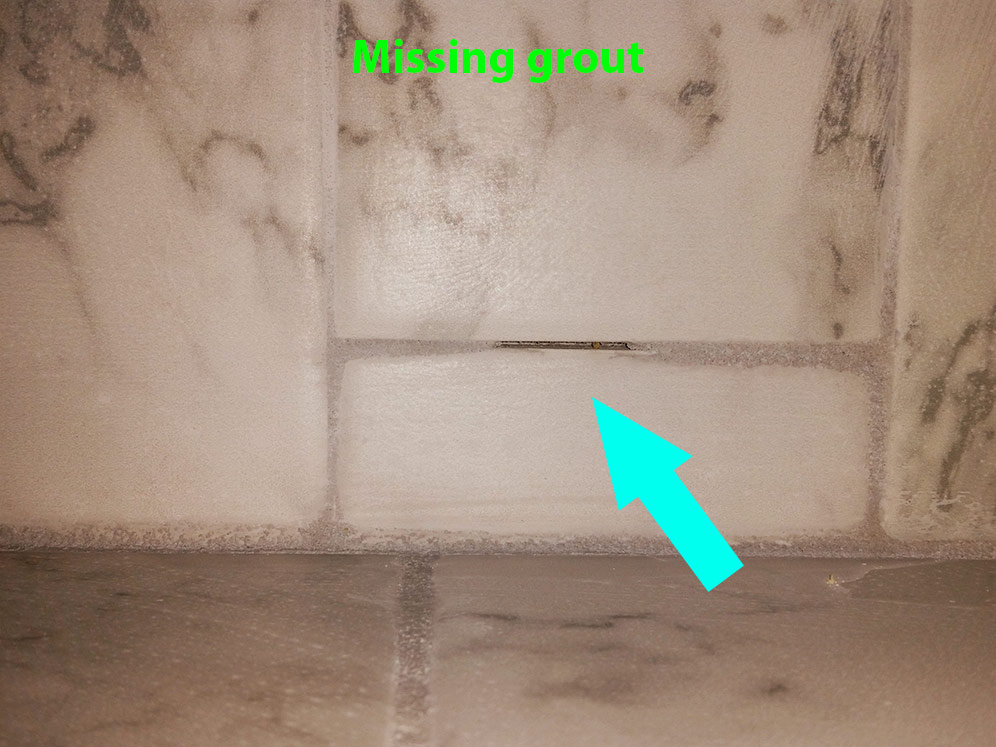
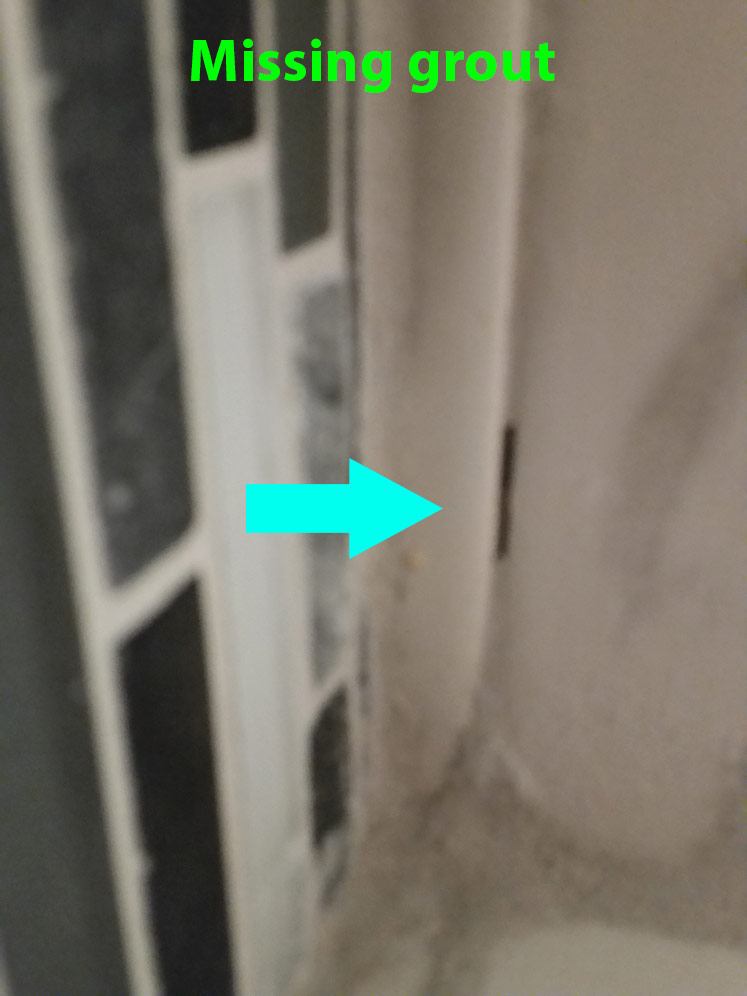
Hard to see in this picture but grout was left like this over many of the tiles.
Who does plumbing stub outs like this? There were no hangers behind the wall. A firm support helps keep torsion off the pex as you turn the valve on and off and prevents movement from expansion and contraction.
Also, when we were cutting the drain tube for the p-trap adapter the blade of the cutter nicked the hot supply line so I had to repair it, another reason the supplies should be hung properly away from the drain.
I've never heard of grouting the door jam to the tiles. I guess this is the quick way to avoid undercutting the jam properly.
For some reason a curve was cut into this tile. They could have simply put in another tile.
There were a few issues with the mosaic niches. We originally asked that they provide a 12" tall finished storage space, these are closer to 8" since Mr. Bruderick didn't account for the width of the backer board or the tile and mortar. If you look closely at these three mosaics you'll notice the bottom panel actually slopes down as the pattern goes to the right, it was installed crooked. Also, we specified that the mosaic detail strip that goes around the shower should BISECT the middle niche. I didn't know that definition of "bisect" needed much clarification. There is also a slight slope to the detail strip to the right of the niches.
And one of the most egregious errors James Dean made was the installation of the shower sill. The marble sill plate was installed such that it sloped out toward the main bath floor and not into the shower. This caused any water that hit the glass door to drip down to the sill and out into the bathroom rather than back into the shower.
This seems like a very basic thing, odd to have it done incorrectly:
Tile work brought to you by James Dean Bruderick of Creative Decor at 6917 Sanilac Rd., Kingston, MI 48741
When we asked for corrections to the tile work James Dean Bruderick simply gave statements like, "lippage is a challenge" and "I have done more then [sic] 50 showers in the last 5 years, Yours is beautiful"
When asked about code violations James Dean Bruderick offered to correct them if we "really felt" that is was necessary. I wasn't aware that basic code requirements were about feelings.
We also inquired about other aspects of the job (like construction of the shower pan) with James Dean Bruderick and he gave responses like, "The shower is installed 100% correctly, are we really going there?" That seems like an odd response rather than simply answering the questions. Also, it turned out that some things were in fact not 100% correct.
Blowing off questions, not addressing/fixing concerns, lack of a punch list, code violations, use Creative Decor at your own risk.