Showing posts with label Addition. Show all posts

Sunday, August 3, 2014

Gutter Drain Project II


The great gutter drain project... II

Where were we.. ah yes, we got the pile of rocks we needed for the well.

 
Next we just dig a hole, line it with fabric, put the rocks in with the flo well, and cover it all up.
Easy right?


It turns out the specs for the amount of run off we have call for a 7 foot deep hole with a 10 foot diameter, there are 14 tons of rocks, about 200 feet of fabric lining, and the dirt is mostly clay.


Time to bring out the big guns, neighbor Larry and his Case 580 to the rescue!


 With Larry's help we were able to get the fabric in along with 3' of rock in a few hours.


The next day I wrapped the dry flo well with fabric, and glued up pipe out to the center of the hole. Then I finished filling the hole with rock up to the flo well top edge. We were able to ditch some of the junk rock we had laying around from construction into the pit.


Another couple of loads then we folded the fabric over the well and packed dirt back into the hole. We extra care to ensure the pipe had packed support from below and all sides.


Also, in other news, for some reason day care sent my son home with an interesting hairdo.


And my Dad came over with his new toy.


Wednesday, July 23, 2014

Gutter Drain Project I


We were a little tired of having mud rivers in our backyard each time we got a down pour. So we decided to pipe the gutters underground to a dry well system. Below is the basic plan we used to figure our materials list. The pipe run extends about 100 feet from the house.


The grade in the backyard was more than sufficient to keep the pipe angle in the ditch on track without having to dig deeper as the pipe made the long run out to the dry well. We opted to solvent weld schedule 40 pvc for the system for it's strength. Should heavy equipment ever need to venture into the backyard we wanted to minimize any impact it could have on the system.

Starting on the west end of the porch we buried pipe for a downspout on the side of the house and two that are connected to the porch pillars.


From there the pipe wrapped around the stairs to meet up with the main trunk.


Lines from the east side of the porch were also tied into the main line. Portions were glued up and buried as we progressed. Many of the pipes protruding upwards in the pictures are there just to keep dirt from getting into the system while digging.


From there the run continued down the slope and away from the house. Our depth was kept a bit more than 24" below the surface.


Once we got close to the brush we made a 22.5 degree turn toward the planned dry well location.


Aiden was a bit curious about the pits developing in the yard.


On occasion Buster has chased chipmunks into some gutters we have lying behind our garage. His chipmunk chasing has resulted in him assuming there is always something hiding in any type of pipe. After hearing a shovel full of dirt hit the pipe as it was buried he frantically wanted to get at the imaginary critter. He kept barking into the pipe and clawing at the open end.


Aiden decided he also wanted to take a turn barking into the tube. 


Washed stone has arrived for phase 2.... digging and installing the dry well.


Thursday, May 8, 2014

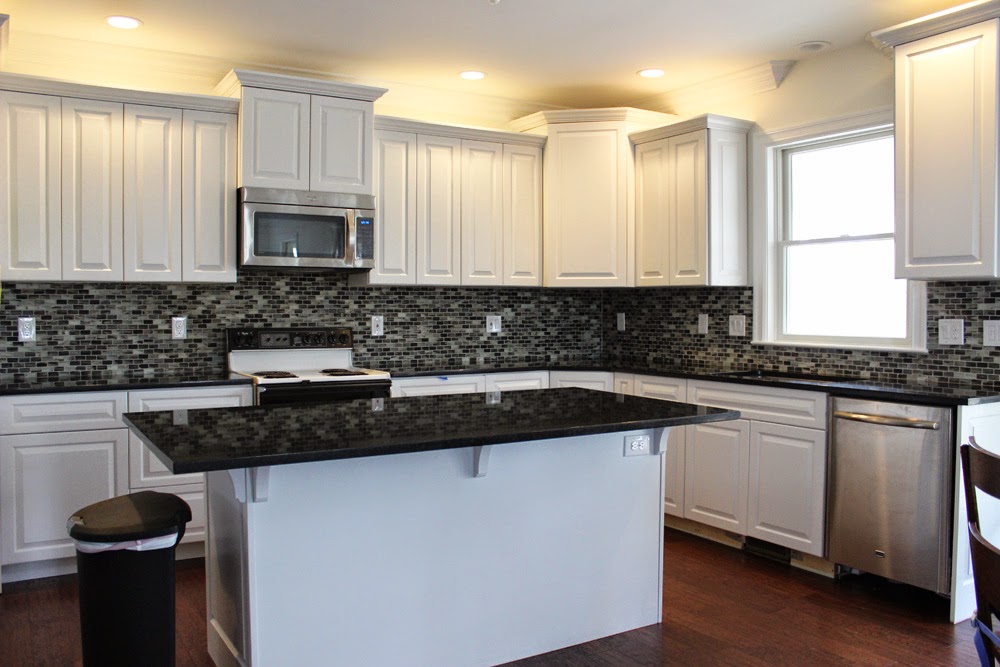
Kitchen Backsplash

The kitchen back splash is nearing completion. We chose a glass tile by stone and pewter accents . The style we went with was their Sumi-e 1 X 2" brick layout in Ohara Silk with Oyster Gray grout.

Before:

After mortar work, no grout yet.


After the grout work, still need to clean and seal the tile.


Hmmm...  I may need to switch out some of the outlets and or face plates to match up with this new look.


We reinstalled the sink drain with a new garbage disposal. We are excited about not having to empty a food catch basket a few times a day. 


 We are happy to have the dishwasher back in operation.


After cleaning and sealing:


Wednesday, April 30, 2014

Attic Fun....

I happened to be home one day during the extremely cold winter days and an odd thing happened, our smoke alarms when off. When this happened I went around to each alarm disabling it and taking it out of it's junction box to inspect the wiring. When I got to the alarm in our bedroom some water poured out when I took it down. I called our general contractor to see what his thoughts were. He mentioned that sometimes warm air can make it's way into the box and condense during these very cold days but I should probably take a look in the attic to see if there are any obvious issue. When I went in the attic I saw frost build up on the nail heads protruding from the roof sheathing so the condensation theory seemed quite feasible. I didn't dig around much more.

Well, a couple of days ago (in warmer weather) Jess was noticing a smooshy portion of the drywall near that same smoke alarm. This time I explored the attic a bit further.  I noticed that one of the new vent stacks had an unusual "Y" in it that went nowhere. I think the core issue was that condensate built up in the larger dead end portion, froze, expanded, and burst the end cap.


Wednesday, April 23, 2014

Cabinet Crown Trim & LED Wire


We are almost complete with the cabinet crown trim. I just need to fill in the pin nailer holes with some colored wax to blend into the prefinished surface.  Dealing with a prefinished surface didn't leave room for error since filling gaps or sanding away blemishes isn't much of an option. I made a little jig to help get the corners accurate. The jig holds the pieces together at the proper angle while the glue dries.


We just need to make some adjustments to the doors to even out the upper gaps.


We were getting used to using the kitchen being functional so a little chaos was in order.

I think we finally are ready to move forward on our back-splash installation project. I did a little under cabinet LED wiring prep. Originally we were going to have a valence that would span the gap over the sink. Since the valence didn't work out I needed another way to route signal and low voltage power cable to the free standing cabinet to the right of the sink.

I simply embedded the cabling in the drywall and fished it up into the cabinet. All this will eventually be covered in mortar and tile.


Thursday, March 13, 2014

Spring is just around the corner.... I think.


We've been slowly chipping away at "bin city" getting our belongings distributed throughout the house, basically spreading the mess out. I've been tackling smaller projects to help us get organized. Shelving was built into our master bedroom closet. The supports will get painted later on.


Jess has been busy pretending to get ready to paint some of the remaining bare trim.


But I think she's been a little busy dealing with this brand new 1 year old.


 The basement has become the new wood shop for the winter, I've been spending time down there trying to figure out what to do about the trim on the kitchen cabinets.

The crown is getting mounted to a painted backer board and brought out flush with the doors. We found out a couple of weeks ago that the lower cabinets have changed dimensions somehow and we need to remove the granite and reset them. None of the trim can really be mounted in it's final location yet since we don't know if the cabinets will be aligned properly after the bottom cabinets are adjusted. Not too happy with the delays. Our doors are also suffering from some issues and are all being remade, frustrating.


Here is what I have planned for the lower cabinet trim light rail.


 Behind the light rail we'll put some fun color changing LED strips.


 The short lived spike in outdoor temperatures have revealed the mud pit left by summer renovations. This mess was hidden beneath the snow all winter. This is going to be a squishy sloppy spring season.... if it ever gets here.


We got pelted with another few inches of snow yesterday...so we'll see.